Facebook setup guide
Follow these 4 major parts to connect your custom Facebook App for Chat & CAPI integration.
Preparation
Get everything ready before we start.
Dataset & Business
Ensure that the Dataset (Pixel) you want to use and the Page to connect to Messenger are in the SAME Business Manager.
ROI Track Tenants
Create your Tenant in ROITRACK and have the Settings page open and ready.
Installation (Step-by-Step)
Configure Meta App and Link with ROITRACK.
Create & Live Meta App
Go to Meta Developers, create a Business App.
Fill in Basic Info (Display Name, Contact Email).
In App Domains, enter: backend.roitrack.io
In Privacy Policy URL, enter: https://roitrack.io/privacy
In Terms of Service URL, enter: https://roitrack.io/terms
Switch to Live Mode before proceeding.
Configure ROITRACK Settings
Copy App ID and App Secret from Meta App Basic Settings.
Paste them into ROITRACK Tenant Settings.
roiSet "Verify Token" to exactly roi to avoid confusion.
Click "Save Config" and ensure you get a Success confirmation.
Messenger Webhook Setup
In Meta App Dashboard, add Messenger product.
Go to Configure Webhooks.
Enter the Callback URL: https://backend.roitrack.io/webhooks/facebook/<your-tenant-id>
Use verify token: roi
Required Subscriptions (5 Items)
- • inbox_labels
- • messages
- • message_echoes
- • messaging_postbacks
- • messaging_referrals
Add Page Subscription
Still in Messenger Settings, scroll to "Settings" (or Webhooks section).
Add your Facebook Page.
Click "Edit Subscriptions" for that page and Check ALL 5 items listed above again.
Save.
Facebook Login Setup
Add Facebook Login for Business product.
Go to Settings.
Add Valid OAuth Redirect URI: https://backend.roitrack.io/facebook/connect/callback
Save Changes.
Connect & Verify Business
Go back to ROITRACK Tenant Settings.
Click the big Connect Facebook button.
Once connected, you will see your Tenant settings refresh.
Link Page & Dataset
Now that you are connected, you should see your Page ID and Ad Accounts (for Dataset).
Select the correct Page ID.
Select or Enter the correct Dataset ID (Pixel ID).
Review the Keywords below (e.g. #VC, #LEAD, #BUY).
Click Link / Save.
Final Test
Go to ROITRACK Dashboard.
Open your Facebook Page as a customer (use a personal account).
Send messages with keywords: #VC, #LEAD, etc.
Click the Refresh button on the Dashboard.
If numbers appear, Congratulations! Connection Complete.
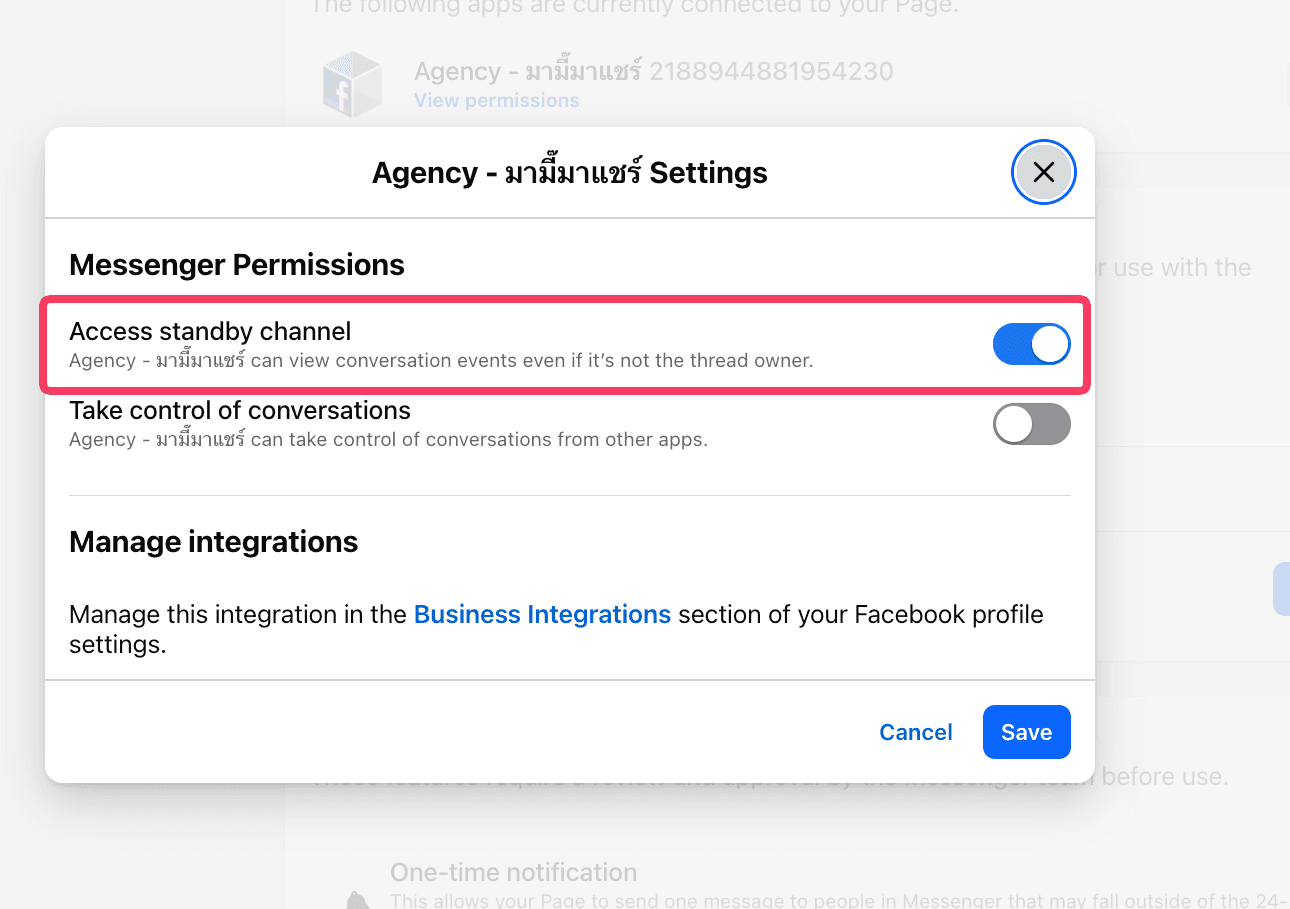
Verify Connected Page Apps
Make sure no other app takes control of conversations, or ROITRACK will miss messages.
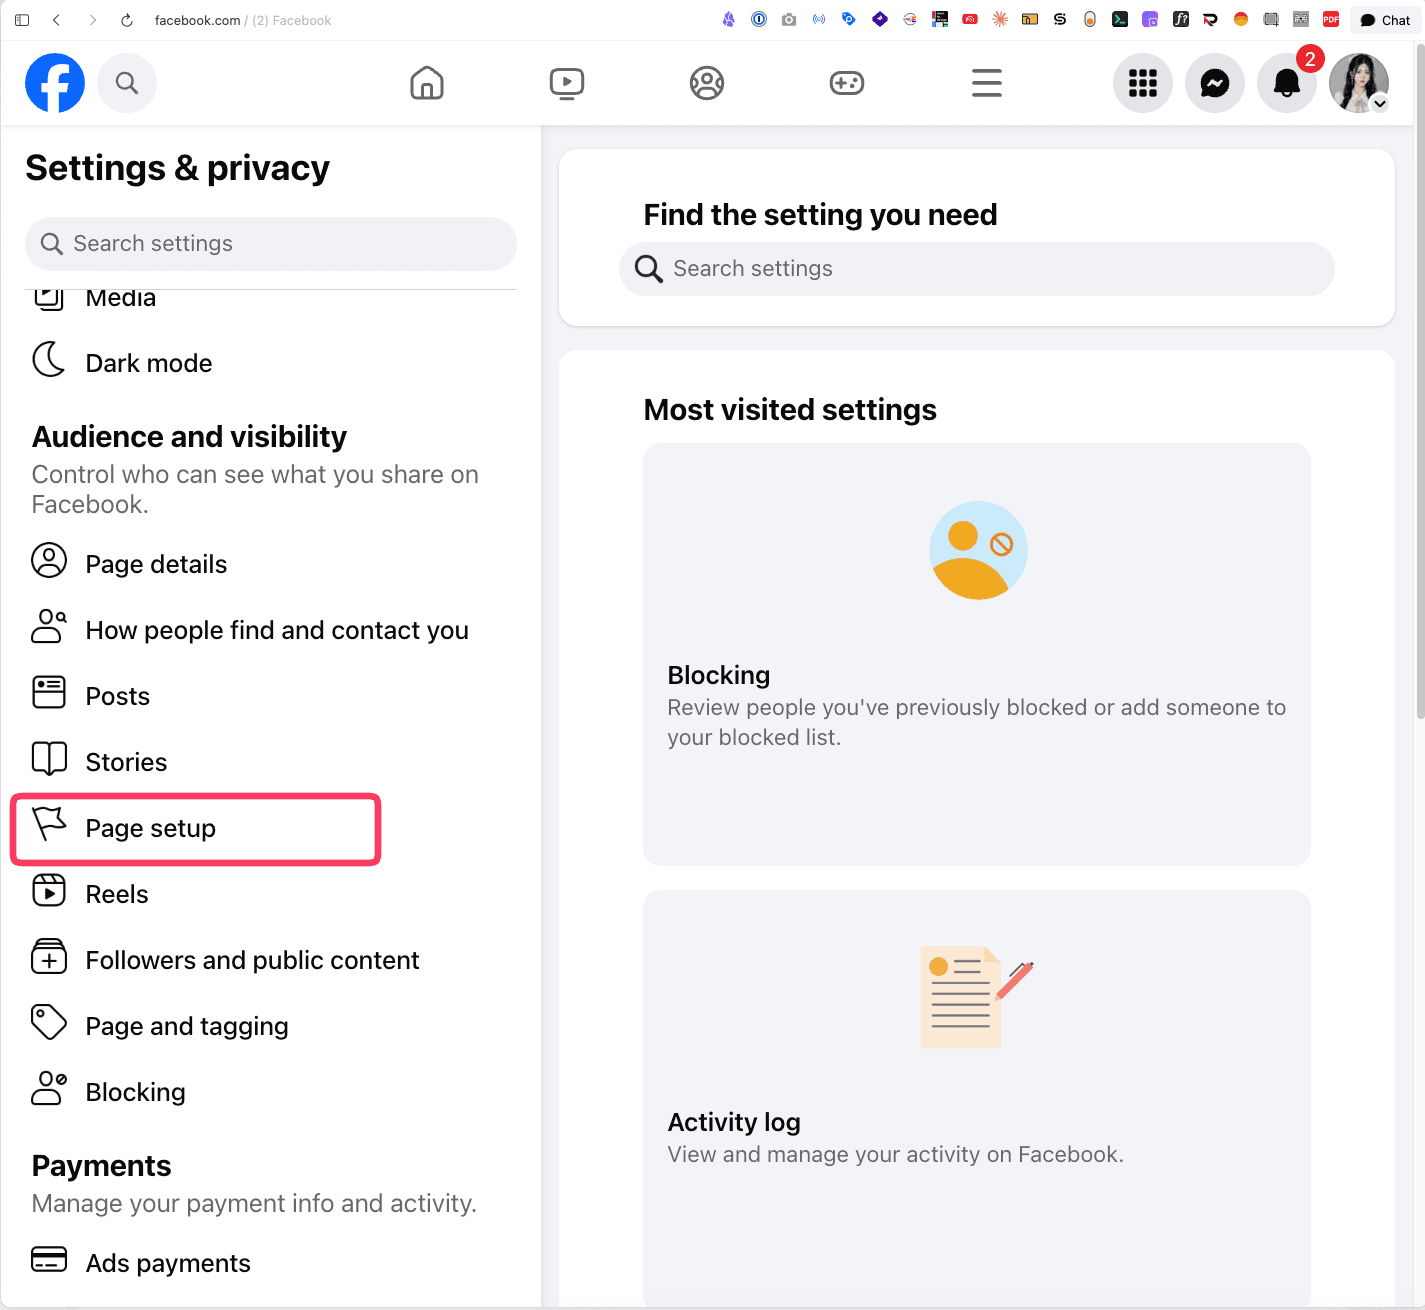
Open Page Setup
Go to your Page settings at facebook.com/settings.
In the Settings & privacy menu, select Page setup.
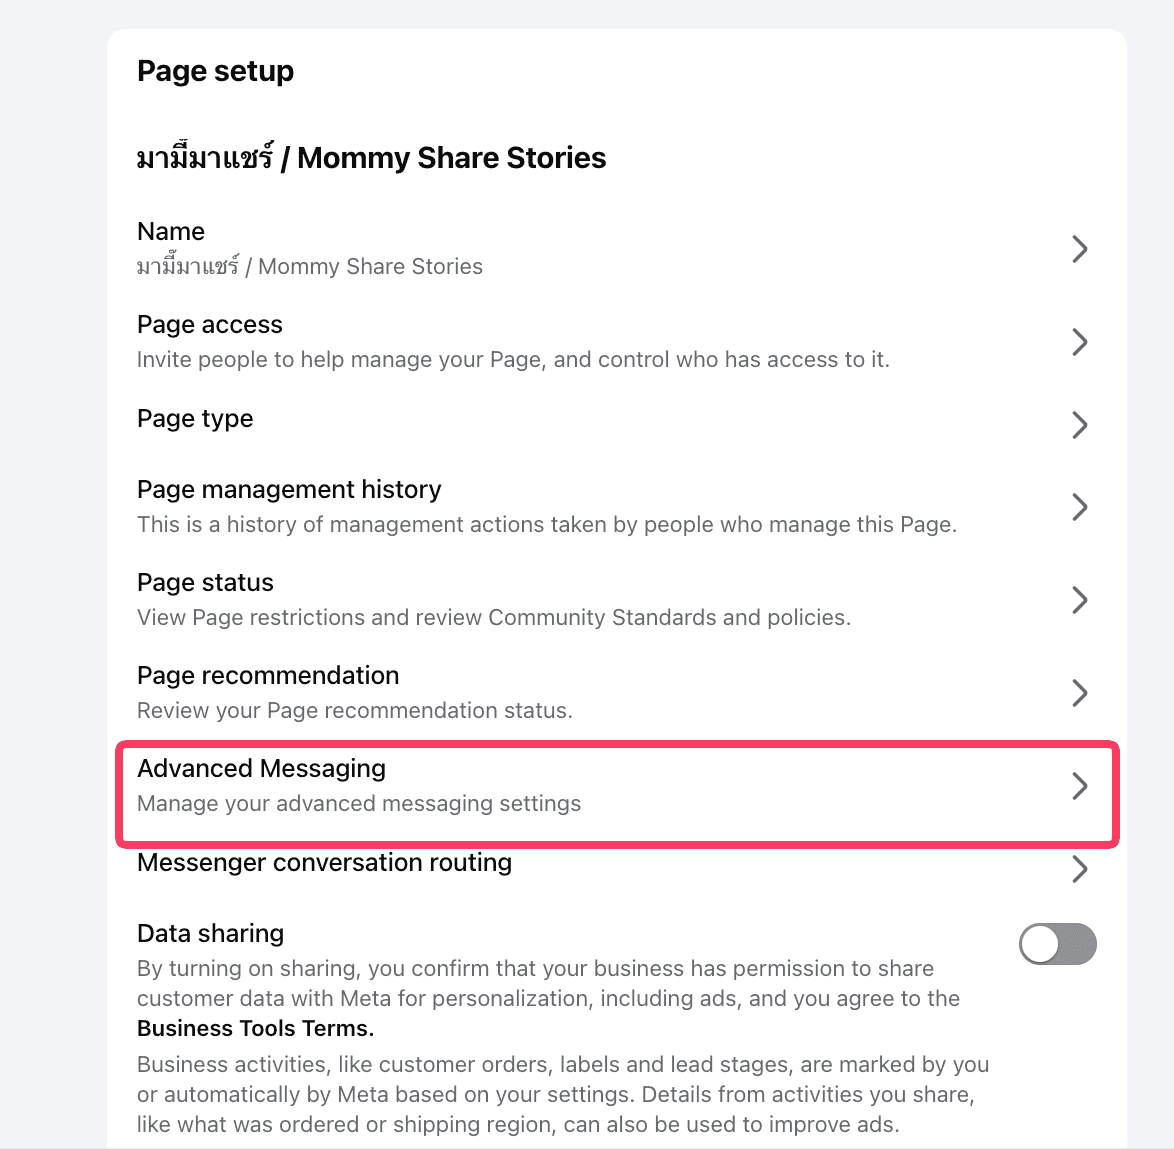
Open Advanced Messaging
In Page setup, select Advanced Messaging.
Check Every Connected App
Review all apps connected to your Page and click Edit on each one.
Every app must have Access standby channel only. No app is allowed to have Take control of conversations turned on.
Optimization & Future
Leverage the data for better Ads.
Usage & Dashboard
Learn to use the Heatmap to see peak hours. Adjust Keywords in settings. You can capture values like #BUY,1500.
Ads Manager Setup
- • Setup Column: Lead (Customer Data)
- • Setup Custom Metric: Lead : Chat %
- Logic: Sending Good Signals (Purchase/Lead) vs Bad Signals (Block) back to Meta improves AI targeting.
Future Features
Create Custom Audience & Lookalike (LLA) for Remarketing.
Create Custom Audience for Exclusion (LLA 3% Exclusion).